Strutsのインストール
| 目次 |
|---|
|
・Strutsのインストール ・Eclipse + Tomcatプラグインで開発 ・Tomcatプロジェクトの作成 ・web.xmlの作成 ・struts-config.xmlの作成 ・strutsライブラリをビルドパスに追加 |
Strutsのインストール
strutsをインストールするには、 こちら にアクセスし、struts1.3.10をダウンロードします。下図を参考にしてください。
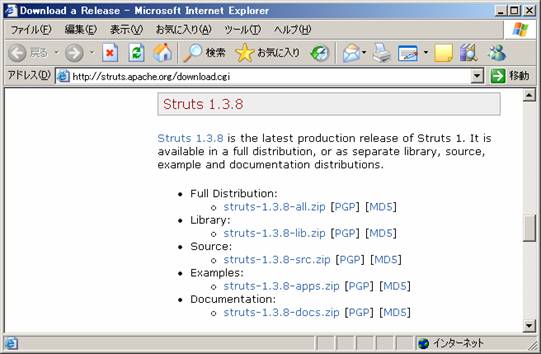
struts-1.3.10-all.zipがダウンロードされるので解凍します。struts-1.3.10-all.zipからも同じものがダウンロードできます。
とりあえず適当な場所に配置してください。
実行環境
struts-1.3.10-all.zipがダウンロードされるので解凍します。struts-1.3.10-all.zipからも同じものがダウンロードできます。
とりあえず適当な場所に配置してください。
Eclipse + Tomcatプラグインで開発
Eclipse4.3 + Tomcatプラグインで開発します。TomcatプラグインはtomcatPluginV33.zipをダウンロードしてください。
解凍したら、Eclipse¥plugins配下に配置します。このプラグインがないと、Tomcatプロジェクトが作成できません。
Tomcatのインストールはapache-tomcat-5.5.36.zipをダウンロードして解凍してください。
ここでは、解凍してC:¥tomcat5.5にリネームします。
先ほど解凍したStrutsのstruts-1.3.10-all¥struts-1.3.10¥apps内にstruts-examples-1.3.10.warというファイルがあります。
これをC:¥Tomcat¥webapps配下に配置します。
EclipseからTomcatを再起動し、http://localhost:8080/struts-examples-1.3.10/にアクセスします。
Tomcatプロジェクトの作成
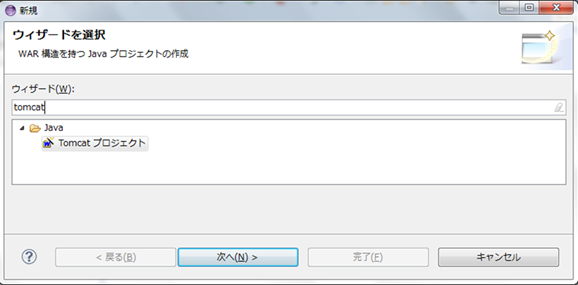
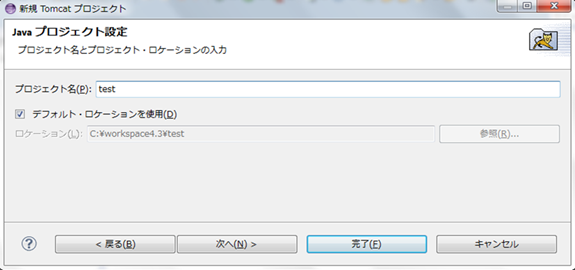
Eclipseの「ファイル」-「新規」-「その他」より「Tomcatプロジェクト」を選択して「次へ」を押下します。
Tomcatプロジェクトの作成
Tomcatプロジェクトの作成
web.xmlの作成
Tomcatプロジェクトを作成したら、次にweb.xmlを作成します。
先ほどのstruts-examples-1.3.10.warをstruts-examples-1.3.10.war.zipなどにして解凍します。
WEB-INF配下にweb.xmlが存在するので、それをそのままTomcatプロジェクトのWEB-INF配下にコピーし、以下のように修正します。
先ほどのstruts-examples-1.3.10.warをstruts-examples-1.3.10.war.zipなどにして解凍します。
WEB-INF配下にweb.xmlが存在するので、それをそのままTomcatプロジェクトのWEB-INF配下にコピーし、以下のように修正します。
<?xml version="1.0" encoding="iso-8859-1"?>

<!DOCTYPE web-app PUBLIC
        "-//Sun Microsystems, Inc.//DTD Web Application 2.3//EN"
        "http://java.sun.com/dtd/web-app_2_3.dtd">

<web-app>
    <display-name>Struts Examples Application</display-name>
    <!-- Standard Action Servlet Configuration (with debugging) -->
    <servlet>
        <servlet-name>action</servlet-name>
        <servlet-class>org.apache.struts.action.ActionServlet</servlet-class>

        <!-- Default -->
        <init-param>
            <param-name>config</param-name>
            <param-value>/WEB-INF/struts-config.xml</param-value>
        </init-param>

        <init-param>
            <param-name>debug</param-name>
            <param-value>2</param-value>
        </init-param>
        <init-param>
            <param-name>detail</param-name>
            <param-value>2</param-value>
        </init-param>
        <load-on-startup>2</load-on-startup>
    </servlet>

    <!-- Standard Action Servlet Mapping -->
    <servlet-mapping>
        <servlet-name>action</servlet-name>
        <url-pattern>*.do</url-pattern>
    </servlet-mapping>

    <!-- The Usual Welcome File List -->
    <welcome-file-list>
        <welcome-file>index.jsp</welcome-file>
        <welcome-file>index.html</welcome-file>
        <welcome-file>upload.jsp</welcome-file>
    </welcome-file-list>

</web-app>
struts-config.xmlの作成
先ほどのstruts-examples-1.3.10.warをstruts-examples-1.3.10.war.zipなどにして解凍し、web.xmlと同様にstruts-config.xmlも同じ場所からコピーします。
以下のように修正します。
以下のように修正します。
<?xml version="1.0" encoding="iso-8859-1"?>
<!DOCTYPE struts-config PUBLIC
        "-//Apache Software Foundation//DTD Struts Configuration 1.3//EN"
        "http://struts.apache.org/dtds/struts-config_1_3.dtd">

<struts-config>

    <form-beans>
        <form-bean name="LoginForm" type="jp.co.confrage.form.LoginForm">
        </form-bean>
    </form-beans>

    <action-mappings>
        <action type="jp.co.confrage.action.LoginAction"
            path="/LoginAction" name="LoginForm">
            <forward name="success" path="/WEB-INF/pages/login.jsp" />
        </action>
    </action-mappings>

    <message-resources parameter="MessageResources"/>

</struts-config>
strutsライブラリをビルドパスに追加
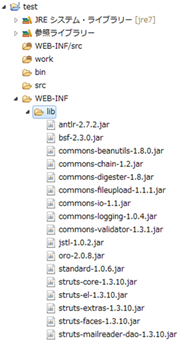
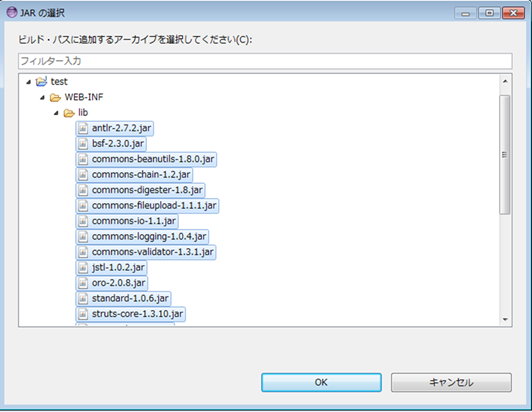
struts-1.3.10-all.zipを解凍したらlibフォルダがあるので、その中のファイルを全てWEB-INF¥libにコピーします。
Eclipse上でF5を押すとライブラリが表示されます。
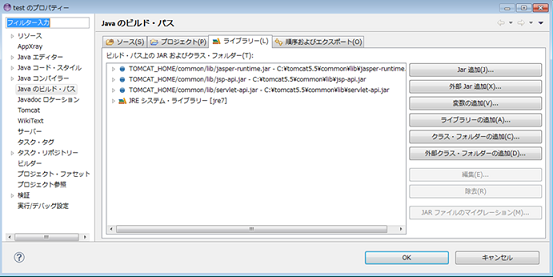
プロジェクトを選択して、右クリックから「プロパティー」を選択します。
以下の画面が開くので、右上の「Jar追加」をクリックします。
先ほどコピーしたWEB-INF¥lib配下のjarを全て選択して「OK」します。
これでStrutsライブラリをビルドパスに追加することができます。
Eclipse上でF5を押すとライブラリが表示されます。
Strutsライブラリ
プロジェクトを選択して、右クリックから「プロパティー」を選択します。
以下の画面が開くので、右上の「Jar追加」をクリックします。
Strutsライブラリ
先ほどコピーしたWEB-INF¥lib配下のjarを全て選択して「OK」します。
これでStrutsライブラリをビルドパスに追加することができます。
Strutsライブラリ